Archery Stance: How to Stand and Shoot with Good Form

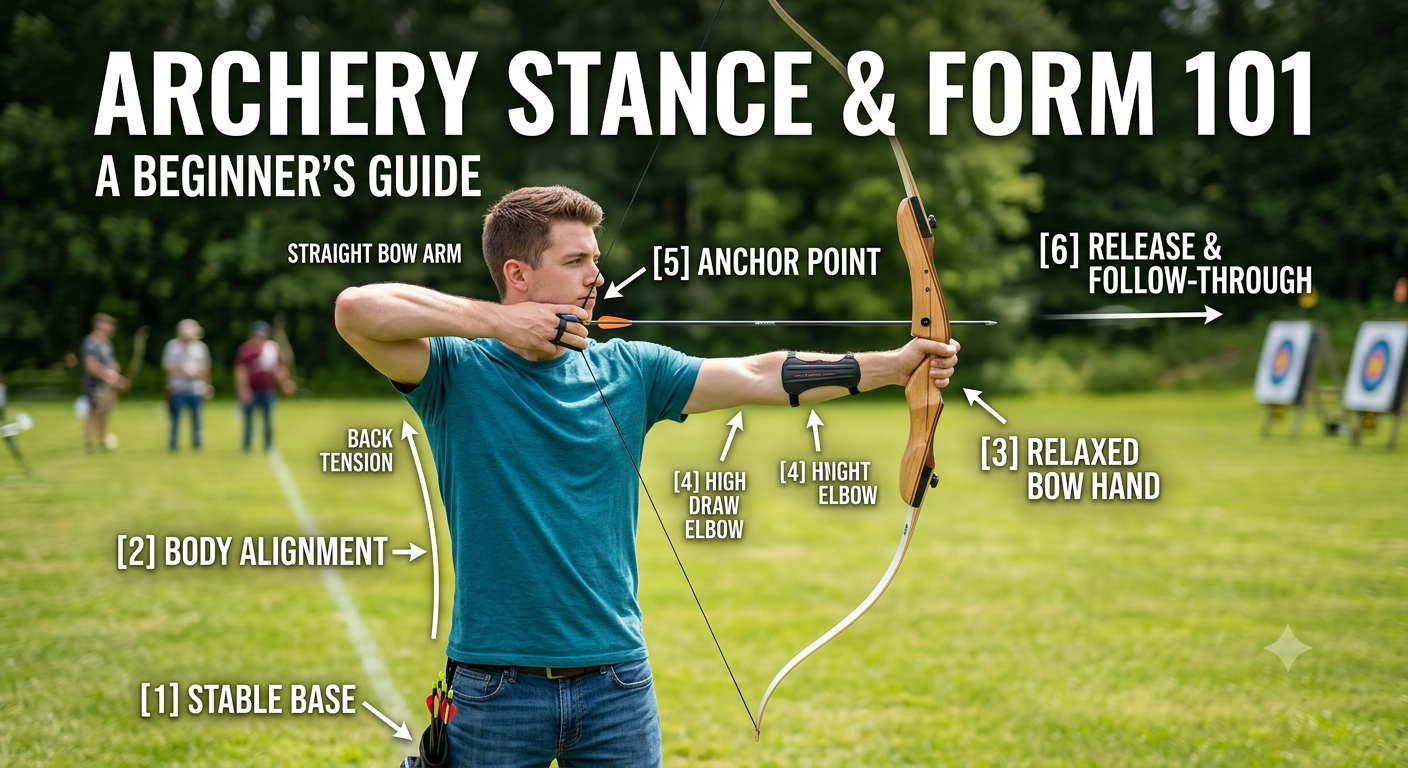
Every archer, from a first-timer at a local range to an Olympian, is really doing the same thing: repeating the same sequence of movements as consistently as possible. Accuracy comes from repeatability, and repeatability comes from good form.
The good news is that form isn't mysterious. It's a short chain of steps, and once you know them, you can practice each one on purpose. This guide walks through the shot sequence for a right-handed shooter (flip left and right if you shoot left-handed), with the most common beginner slip-ups at each stage.
(Still choosing your equipment? Start with our recurve vs. compound comparison and our beginner gear checklist. Form basics are similar across both bow types, but some details differ, especially the release.)
A Quick Safety Note First
Before anything else:
- Only shoot when the range is clear and everyone is behind the shooting line
- Never dry fire (releasing the string without an arrow nocked). It can damage the bow and injure you
- Never point a nocked arrow at anything other than the target
- For your first few sessions, shoot at a range or club with a coach or experienced archer nearby. It's the fastest way to catch bad habits before they set in
Step 1: Stance
Your stance is the foundation for everything else.
- Stand sideways to the target, with your feet about shoulder-width apart, straddling the shooting line
- Your left shoulder points toward the target (for a right-handed archer)
- Keep your weight evenly balanced across both feet, not leaning forward or back
- Stand tall, with knees relaxed rather than locked
Most beginners start with a square stance, where both feet are parallel to the line running to the target. It's simple, stable, and easy to repeat. Once you're comfortable, a coach may suggest an open or oblique stance, but there's no need to rush into it.
Common mistake: a stance that's too wide or too narrow. Too wide and you'll feel stiff; too narrow and you'll wobble.
Step 2: Nock the Arrow
Place the arrow on the arrow rest and nock it onto the string, clicking the nock (the notch at the back of the arrow) onto the nocking point on the string. The index vane (the odd-colored feather or vane) should typically point away from the bow.
Common mistake: nocking the arrow in a different spot on the string each time. A consistent nocking point gives you consistent arrow flight.
Step 3: Set Your Grip and Hooking Fingers
Bow hand: Let the bow rest in the fleshy pad at the base of your thumb, with a relaxed hand. Don't squeeze it tightly. A death grip twists the bow at release and sends arrows off-target.
String hand (recurve): Hook the string with your first three fingers, with the arrow between your index and middle fingers. The string should sit in the crease of your first finger joint, not deep in your fingers, and your hand should stay relaxed.
String hand (compound): Attach your release aid to the string loop.
Common mistake: gripping too hard with either hand. Tension in the hands travels up the arms and shows up in your groupings.
Step 4: Raise the Bow and Draw
- Raise the bow toward the target with your bow arm straight but not locked. Keep the elbow slightly soft and rotated so the string doesn't catch it
- Keep your shoulders low and relaxed, not hunched toward your ears
- Draw the string back using your back muscles, not just your arm. Think of pulling your shoulder blades toward each other
Common mistake: pulling with the arm alone. This tires you out quickly and makes your draw inconsistent. Draw with your back and let it do the work.
Step 5: Find Your Anchor Point
Your anchor point is the spot where your string hand lands every single shot at full draw. Common anchors include the corner of your mouth, under your chin, or along your jawline, and the string usually touches your nose or chin as well.
The exact spot matters less than one thing: it must be the same every time. Your anchor is what fixes the distance between your eye and the string, and that's what makes your aim repeatable.
Common mistake: letting the anchor drift from shot to shot, or floating the hand in the air without touching the face at all.
Step 6: Aim
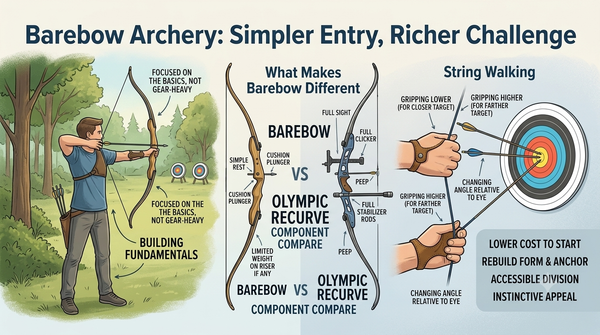
At full draw, keep your head still and upright, and let the bow come to your face instead of tilting your head down to meet the string. If you're using a sight, place the sight pin on the target. Many coaches recommend beginners start with a few sessions of bare bow shooting (no sight) to build form first, then add a sight later.
Stay in this position for a moment. You're building back tension, the feeling of your back muscles holding the draw steady.
Common mistake: rushing. Many beginners release the instant they reach the target. Hold, settle, and let the shot come to you.
Step 7: Release
A clean release is a relaxation, not a snap.
- Recurve: relax the fingers of your string hand so the string slides off cleanly. Don't open your hand or pluck the string
- Compound: squeeze the trigger or activate the release gently, ideally as a surprise, using back tension to fire it rather than punching the trigger
Common mistake: flinching or anticipating the shot. Anticipation (also called "punching" the trigger or "plucking" the string) is one of the biggest causes of scattered arrows.
Step 8: Follow-Through
The shot isn't over when the arrow leaves. Hold your form for a second or two after release:
- Keep your bow arm pointing at the target
- Let your string hand drift back slightly along your neck (this is natural when back tension does the release)
- Keep your eyes on the target until the arrow hits
A good follow-through means you didn't drop your arm early or collapse after the shot, which usually means the release was clean.
Common mistake: dropping the bow arm the moment the arrow leaves. That movement can pull the arrow off-line before it's even left the bow.
How to Practice Form (Without Just Shooting More Arrows)
More arrows doesn't automatically mean better form. A few better ways to spend your practice time:
- Shoot short ends of 3 to 6 arrows and focus on one step of the sequence per session (say, anchor point this week, follow-through next)
- Practice at a short distance (5 to 10 meters) so you're not distracted by whether you hit the gold
- Use a mirror or record yourself on video to spot habits you can't feel from the inside
- Practice draws without releasing. Some coaches use a stretch band for this, so you can build back tension safely
- Ask a coach to watch a few of your shots. A five-minute correction from someone experienced can save you months of unlearning
The Takeaway
You don't need to perfect all eight steps on day one. Start with a stable stance, a relaxed grip, a consistent anchor, and a clean, relaxed release, then layer the rest in over time. Good form is really just good habits, repeated until they're automatic.
Coach, club owner, or archer with a story to tell? This could be your post.